To have a decoration on the table that you can eat - that is the purpose of this table centre piece / dessert / snack - whatever you want to call it. Christmas holidays are a time when I try out a lot of new recipes because I have so much time on my hands. Last Christmas, I got this cookie cutter set as a present from my daughter and I have been waiting to try it out ever since. One year on and I finally get to play with my new toy!
My daughter and I decided to embark on this project because I was keen to try it out - well, me more than her. She wanted to concentrate on her special almond cookies and chocolate brownies, but I needed her help with this one - so she got roped in by default.
My daughter has a very good eye for alignment and symmetry so I had to rope her in. Left to myself, this would have been a lopsided Christmas tree! ha ha!! And thank you to my amazing photographer husband for this picture.
Ingredients:
A 10 piece star cookie cutter set in graded sizes
Plenty of baking paper
For the dough:
125 grams unsalted butter
100 grams (1/2 cup) firmly packed brown sugar
1 egg, separated
125 ml (1/2 cup) golden syrup
375 grams (21/2 cups) plain flour
1 tablespoon ground ginger
1 teaspoon mixed spice
1 teaspoon bicarbonate of soda
Plain flour to dust
Icing sugar - about a tablespoon, to stick down the cookies
The above measurements make 10 stars. To make the tree, you need 20 stars. So, if you are planning on making the tree, double the quantity above to make the dough.
Method:
Preheat oven to 180 degrees C.
Cut several pieces of baking paper to fit your baking tray - I had about 8 going at the same time so I could rotate the trays with the cut cookies.
Use an electric mixer to cream the butter and sugar until light and fluffy. Next add the golden syrup and egg yolk. Beat till combined. Next add the flour, powdered ginger, bicarbonate of soda and mixed spice powder. As soon as it is combined, get the dough out of the bowl, place it on a lightly floured surface and knead to a smooth flat disc. Cover with cling wrap and leave it in the fridge for 30 minutes.
Repeat the whole process if you are making 20 stars and leave the dough to rest for 30 minutes as well.
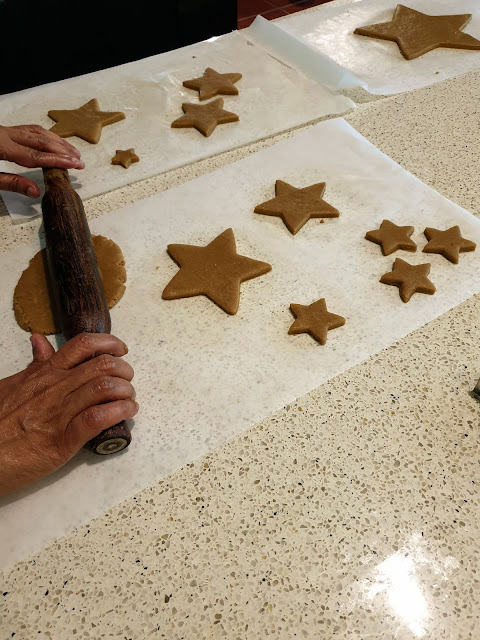
After 30 minutes, take the dough out and roll it out directly on one of the previously cut baking sheets. The dough must be about 4 mm thick all over. Use the cookie cutter to cut out the stars. Remove the excess dough and repeat on the next sheet of baking paper. Meanwhile, you can place the first tray in the oven. It took us 12 minutes exactly to cook - but your oven time might differ slightly. At about the 6 minute mark, turn the tray around so that the cookie is evenly cooked on all sides.
My daughter and I had a nice factory production line happening with the dough, the sheets, baking and cooling of the cookies. You have to leave the cookies in the tray for a further 5 to 7 minutes before turning them out on a rack to cool.
Rolling out the dough directly on to the baking sheet
Ready for baking
Baked cookies - they smell so good!
Cooling on a wire rack
The next step was the assembly. To make the glue, we used a tablespoon of icing sugar and mixed it with enough water to make a very thick solution. This was the glue that was going to hold it all together.
The cooled stars were sorted according to size. We needed two of each size, so we got the two stars together and started the process of gluing them to the cake stand.
Add a dab of the icing sugar to the cake stand and place the first star. Then, place the second star in such a way that the pointy ends are in between the pointy ends of the first star:
Continue placing the stars in this manner till you reach the top.
The last two tiny stars are to be glued together and kept separate from the rest - because that is the topping and is slightly different to the previous stars. This star has five cachous balls placed on the pointy ends on both sides. The cachous is also glued on with the icing sugar mix.
Before you start sprinkling icing sugar, place baking paper along the base so that your cake holder comes out looking clean after sprinkling icing all over.
Now, sprinkle icing sugar using a sieve.
Finally, start sticking the cachous on all the pointy ends of the stars. My daughter did this delicate job with tweezers.
Top it off with the special star at the top.
Take as many pictures as you like......
And then some more once we started to eat it!
Merry Christmas, everyone - from Kitchen Anugraha - one more successful project completed thanks to my patient and eagle eyed daughter!


No comments:
Post a Comment